The first time a contractor asked me for "three-sided beams" early in my design career, I nodded along pretending I understood exactly what he meant. Later research revealed the entire world of beam face configurations—a critical specification that determines installation method, visual outcome, and project cost. The choice between 1-face, 2-face, and 3-face beams isn't arbitrary; it flows directly from your structural situation and aesthetic goals.
Understanding these configuration options transforms how you approach ceiling projects. Rather than forcing one beam type into every application, you match the product to the specific installation challenge. This targeted approach reduces material waste, simplifies installation, and delivers professional results that appear intentional rather than improvised.
1-Face Beams: Vertical Accent Applications
Single-face beams function as vertical accent panels rather than traditional beam profiles. These flat panels replicate one face of a timber beam, providing wood texture and color without three-dimensional depth. The application most suited to this configuration is vertical wall surfaces where you want wood beam visual language without actual projection into the room.
I've specified 1-face products for feature walls in restaurants where vertical rhythm creates interest without sacrificing floor area. Installing these panels between floor and ceiling creates pilaster effects that suggest structural columns. The lightweight polyurethane construction allows attachment directly to drywall or plaster without structural backing, unlike real timber vertical elements that would require substantial framing.
Storage facility accent walls represent another ideal application. When you need to suggest wood character across large wall planes but cannot accept the weight or cost of actual timber cladding, 1-face panels deliver the appearance at a fraction of the investment. The material installs using the same adhesive methods as three-dimensional beams, creating permanent bonds that withstand normal use without mechanical fasteners.
The cost advantage of 1-face products flows from material efficiency. Manufacturing these panels uses significantly less polyurethane than hollow three-sided beams, translating to lower pricing that can make decorative treatments feasible within tighter budgets. For projects where wood appearance matters but three-dimensional beam presence isn't required, this configuration maximizes value.
2-Face Beams: Corner and Edge Applications
Two-face beams form L-shaped profiles perfect for corner applications where two visible surfaces meet at right angles. The most common use case is ceiling-to-wall transitions where you want to create the appearance of exposed timber framing wrapping from ceiling down onto walls. This configuration creates stronger visual connection between horizontal and vertical planes than separate elements could achieve.
Architectural reveals where dropped ceilings meet full-height walls benefit from 2-face profiles. Rather than stopping ceiling beams abruptly at the wall junction, extending them downward using matched L-profiles creates continuity that reads as intentional design rather than construction necessity. The resulting corner detail suggests timber frame construction where beams naturally transition between planes.
Exterior soffit applications represent another strong use case for 2-face beams. Where roof overhangs create covered outdoor spaces, wrapping the soffit-to-wall corner with L-profile beams suggests timber rafter tails and structural framing. This treatment transforms basic stucco-and-drywall construction into something that appears more substantial and craft-oriented.
Installation complexity for 2-face beams falls between 1-face and 3-face options. You're attaching to two perpendicular surfaces rather than one flat wall, requiring more careful alignment to ensure both faces sit flush against their respective substrates. Corner angles must be true right angles—common in new construction but sometimes problematic in older buildings where settling has created slight deviations.
The material economics of 2-face beams position them between 1-face panels and full 3-sided hollow beams. You're purchasing two finished faces worth of material and manufacturing complexity, resulting in pricing that reflects this middle position. For projects where corner details matter but ceiling-mounted hollow beams aren't needed, this configuration optimizes cost-to-effect ratio.
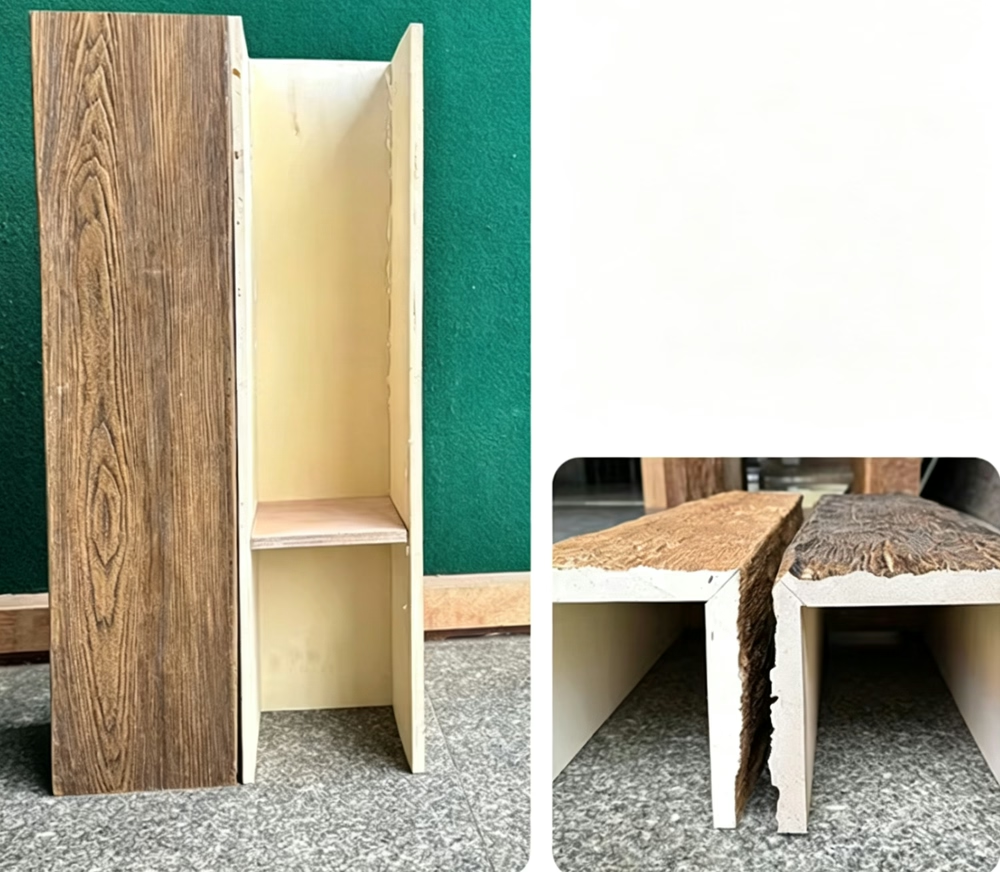
3-Face Beams: Full Ceiling Installation
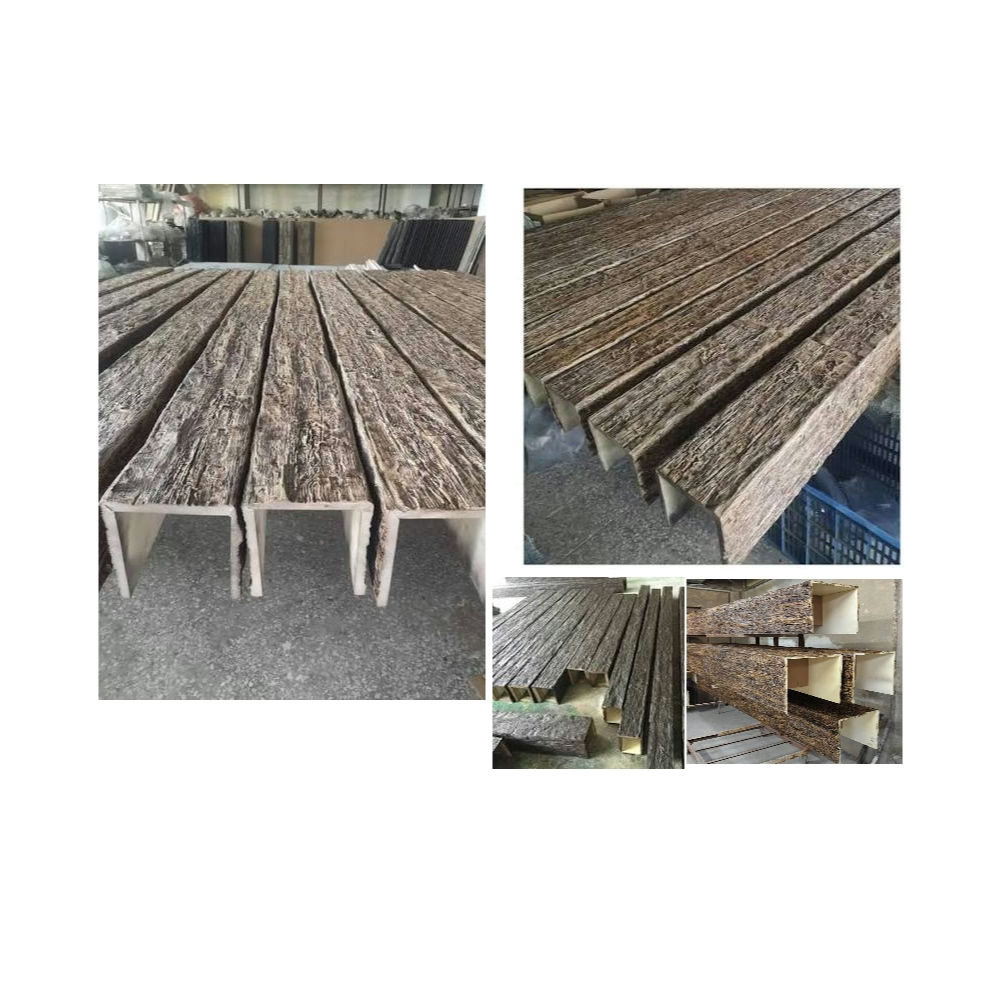
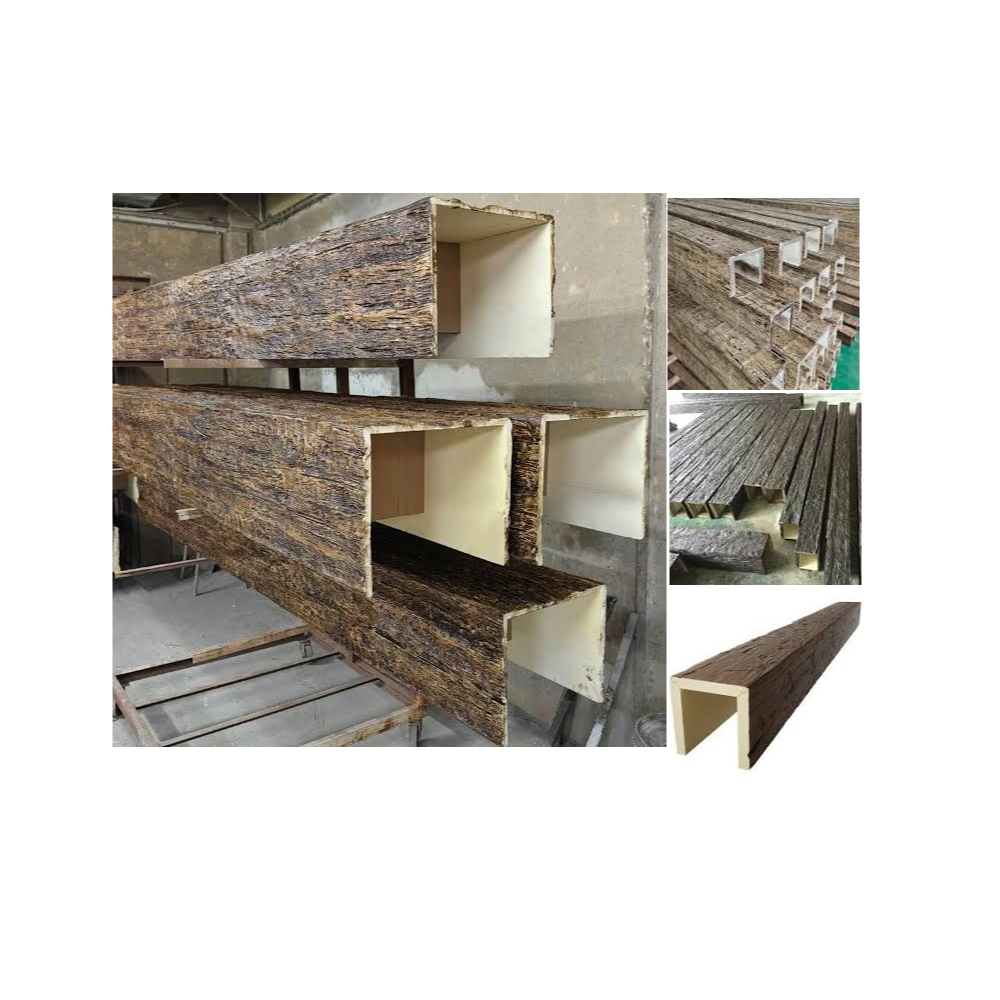
Three-sided hollow beams represent the classic faux beam configuration—the product most people envision when discussing decorative ceiling beams. These U-channel profiles slip over mounting blocks or ledgers attached to ceiling surfaces, hiding the mounting system entirely while presenting three finished faces that replicate timber from every viewing angle.
The hollow core design delivers multiple advantages that explain its popularity. Weight reduction compared to solid beams makes installation manageable for two-person crews without specialized lifting equipment. The void space accommodates wiring, allowing integration of lighting fixtures without visible conduit runs. Mounting flexibility lets you attach these beams to nearly any ceiling structure using appropriate blocking.
Cathedral ceilings in residential great rooms represent the archetypal 3-face beam application. Spanning from ridge to walls, these beams create rhythm and scale appropriate to tall spaces. The three visible faces ensure the beam appearance reads correctly from any position in the room—you never see an unfinished back side revealing the product as decorative rather than structural.
Commercial applications from restaurant dining rooms to hotel lobbies rely heavily on 3-face hollow beams. The installation speed advantage becomes critical when working around business operations or tight construction schedules. Mounting blocks can be installed during off-hours, then beams themselves slip into place quickly during a scheduled shutdown, minimizing disruption to revenue operations.
The specification considerations for 3-face beams focus primarily on sizing and mounting requirements. Beam cross-section must be large enough to accommodate mounting blocks or ledgers inside the hollow core while leaving sufficient clearance for installation. Typical residential beams start at 6x6 inches, with commercial applications often requiring 8x10, 10x12, or larger dimensions for visual scale appropriate to room volume.
Selecting the Right Configuration
Project requirements should drive configuration selection rather than arbitrary preference. Start by identifying your mounting surface—flat ceiling, wall, or corner junction. This immediately narrows appropriate options. Ceiling-mounted applications almost always call for 3-face beams. Walls generally use 1-face panels unless corner transitions are involved. Corners naturally suggest 2-face L-profiles.
Visual goals provide the second filtering criterion. Do you need full three-dimensional beam presence, or will surface texture and color achieve your design intent? Full 3D beams create the strongest architectural statement but consume the most material and budget. Surface panels can deliver wood character at lower cost when dimensional projection isn't essential to the design concept.
Installation complexity and contractor skill level should factor into your decision. Three-face hollow beams require more careful layout and mounting preparation than simple wall panels. If your installation crew has limited experience with faux beams, starting with 1-face wall applications builds confidence before tackling more complex ceiling-mounted systems.
Budget constraints often become the final decision point. When funds are limited but design intent requires wood beam character, choosing the minimum configuration that achieves your goals preserves resources for other project elements. A well-executed 1-face wall treatment can make stronger design impact than poorly compromised 3-face ceiling beams that sacrifice quality for configuration completeness.
Combining Multiple Configurations
Sophisticated projects often mix beam configurations within a single space, using each type where it performs best. A restaurant might feature 3-face hollow beams spanning the main dining ceiling, 2-face L-profiles wrapping down columns, and 1-face panels creating vertical rhythm on feature walls. This layered approach creates visual complexity that suggests comprehensive timber framing.
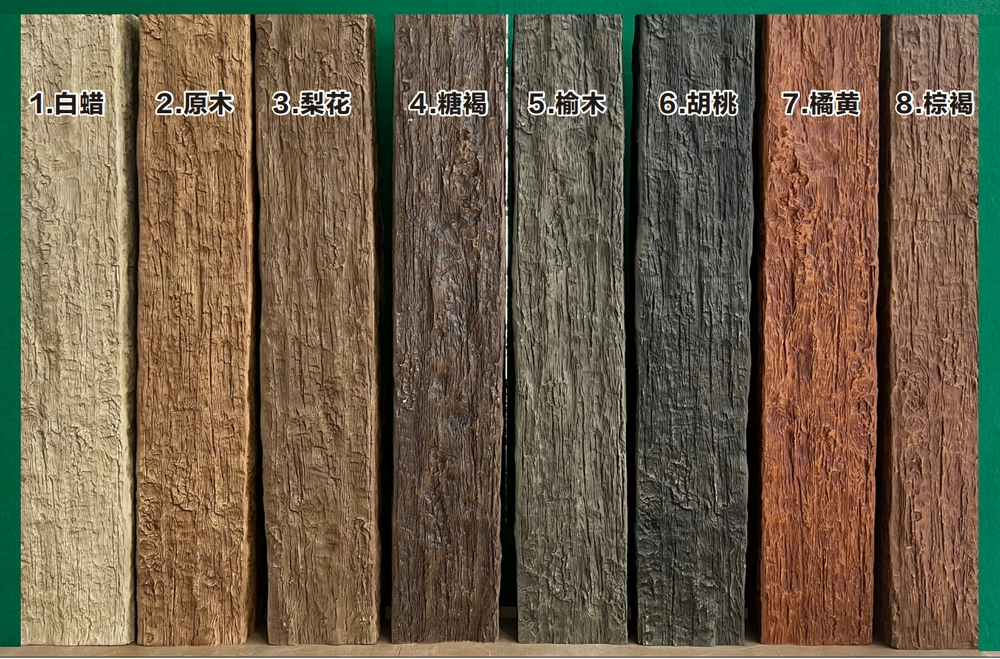
The key to successful multi-configuration design is consistent finish specification. All beam faces visible within the same space should match in color, texture, and sheen level regardless of configuration. Work with manufacturers who can supply different profiles all finished to the same standard, ensuring visual continuity across the various elements.
Transition details between configurations require careful planning. Where 3-face ceiling beams meet 2-face corner profiles, creating clean junctions that appear intentional rather than improvised separates professional installations from amateur attempts. Mock-ups during design development help identify and resolve these junction conditions before they become field problems.
Cost optimization becomes possible when mixing configurations strategically. Use expensive 3-face beams only where three-dimensional presence truly matters—primary sight lines and focal points. Deploy less costly 1-face and 2-face products in secondary locations where they provide adequate visual effect without the premium pricing of full hollow beams.

Understanding the distinctions between 1-face, 2-face, and 3-face beam configurations elevates you from product consumer to informed specifier. Rather than accepting whatever the supplier suggests, you can match beam type to specific installation challenges and design goals. This targeted approach reduces costs, simplifies installation, and delivers results that appear professionally considered rather than generically applied. The configuration question isn't about finding the "best" beam type—it's about selecting the optimal solution for each unique application within your project.
Technical References
ASTM standards cited in every specification
Test Data
Lab results from internal testing program
Updated 2026
Reviewed against current product specs